Google Shopping Ads for E-commerce: Setting Up Shopping Campaigns
Google Shopping makes up 76% of all retail ad spend and drives 85% of total clicks. So it’s no secret that shopping ads are a viable channel for e-commerce stores. So, if you’re in charge of driving e-commerce sales and not using Google Shopping Campaigns, then keep reading. We walk you through how to set up a Merchant Center account, create and structure your Google Shopping Ad campaigns.
Setting up Google Shopping campaigns is a bit different than Google Search campaigns because of one key component- search ads focus on optimizing keywords and shopping campaigns focus on optimizing product sets and products.
Setting up Your Google Shopping Campaign
Before you create a Google Shopping Campaign, you need to have your Merchant Center set up and a product feed linked to your account.
To create a Google Shopping Campaign, start in the Google Ads platform. Select, New Campaign.

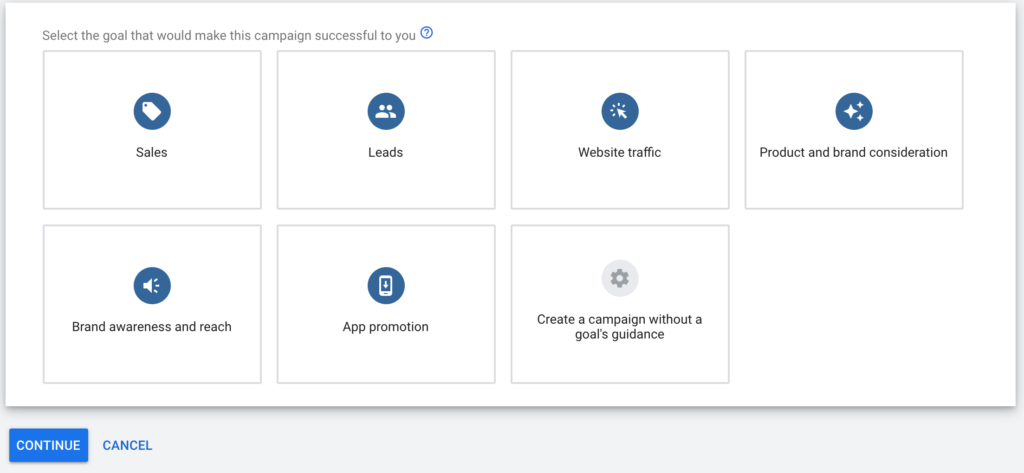
Now you need to choose your campaign’s goal. We recommend choosing the Sales goal for e-commerce.
Next, select, Shopping and your Merchant Center account and then select the country where your products are sold.
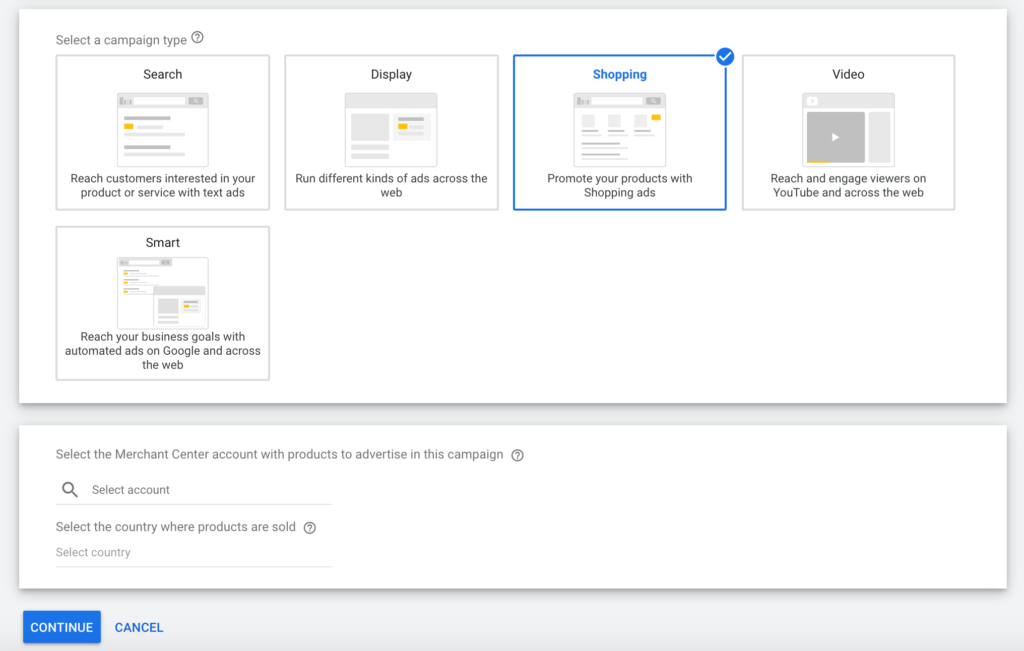
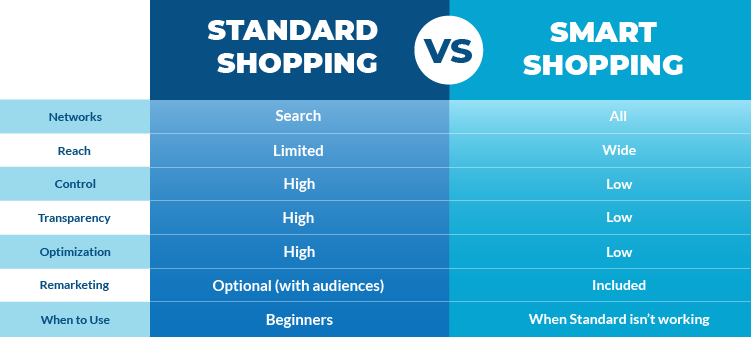
The final option on the first screen is to select your campaign type. You can choose Smart Shopping Campaigns or Standard Shopping Campaigns.

We recommend Standard Shopping campaign. Click, Continue.
The campaign type determines how much control you have over bids and performance.
Next, name your campaign.
Google Shopping Campaign Options
Now you will have some campaign-wide options to choose from, including:
Inventory Filter
Use this filter if you want to limit the number of products used in your campaign. Choose the criteria a product must meet and only the products that match all requirements will be added to your campaign. You can still define products for your campaign at the ad group level.
Bid Strategy
This is where you determine if you want to run a manual or automated bid strategy. You will get the most control selecting Manual CPC, but that takes more time and experience to manage. Selecting Target ROAS will automate your bids to hit the target ROAS you set. If using this strategy, don’t set your target too low or you run the risk of low delivery.
If you set a target to 200%, this means google will automate bids to hit a 2x return on ad spend.
Daily Budget
Select how much you’re willing to spend on the campaign.
Campaign Priority
Only adjust this when running multiple campaigns with overlapping product sets.
Networks
You have the option to opt-in or out of search partners and YouTube and discovery on display network.
Location Targeting
Set the locations you want to run by default. You can expand outside of your default country or narrow down to certain regions/states.
Start and End Dates
You have the option to set your campaign dates.
Click, Save and continue.
Setting up your First Ad Group
Select, Product Shopping.
Choose your Ad Group Name, something similar to the campaign name.
If you chose Manual CPC, you will need to enter your bid amount. We recommend between $0.70 and $1.50 for most products, or about 20-40 percent less than search CPCs. $1 is a good starting point to test.
Your bid should reflect the maximum amount you want to bid per ad group and how much to maintain a profit.
Setting up your Product Groups
Good news! You’ve set up your shopping campaign! Now, we need to focus on our product groups.
The default product group is All products.
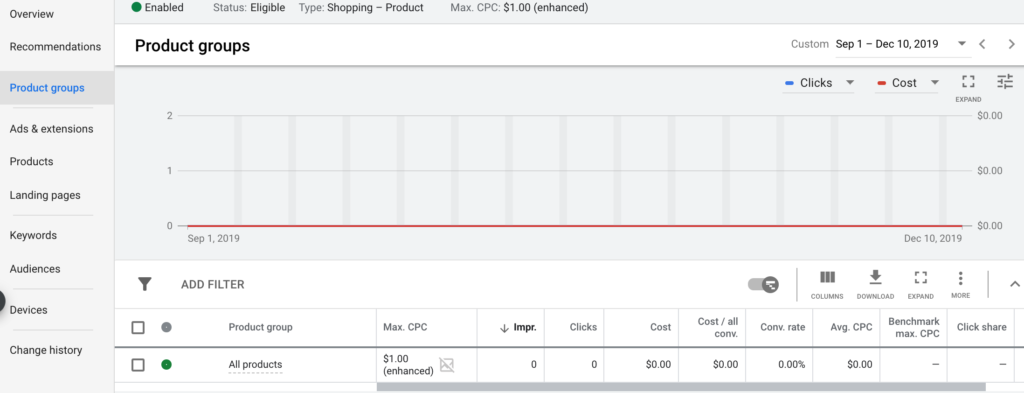
Shopping campaigns are structured by Campaign > Ad Groups > Product Groups.
The product group in our initial Ad Group is targeting all products (with our inventory filter applied) at a bid of $1.00.
Many advertisers not familiar with Google Shopping stop here.
The challenge with this default setup is you don’t have the ability to bid differently on products, product segments (categories or groupings), or easily see product group performance.
A better way to set up your product groups is to separate your product categories/subcategories, plus your top products so you can control bids and have visibility into performance.
While bid control may be less important on automated bidding campaigns (smart and target ROAS), it’s still helpful to breakdown products from “all products” into product groups.
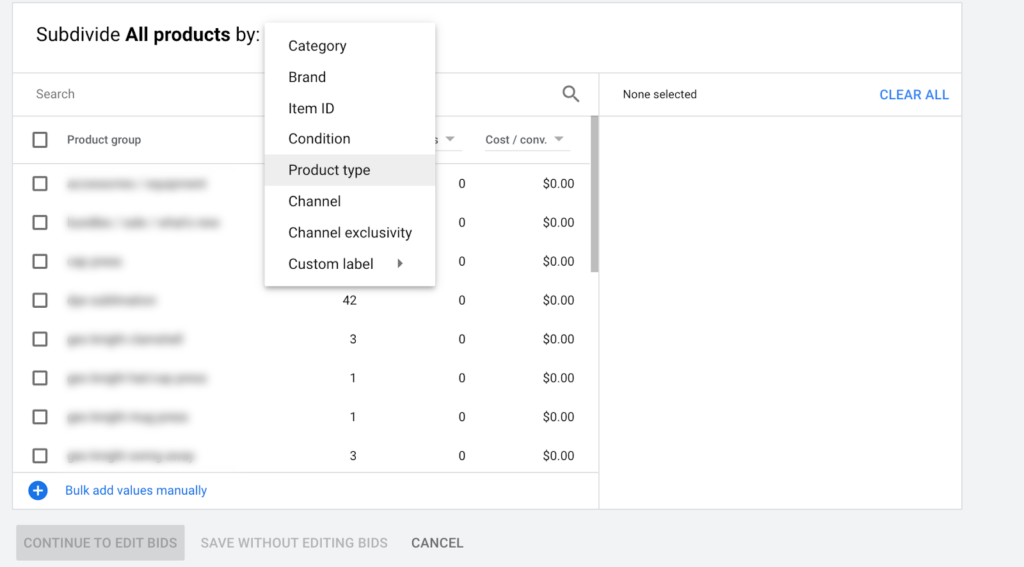
To get started, click
the + next to All Products to pull up the subdivide menu.
The subdivide menu shows you options based on fields from your Product Feed in Merchant Center.
Recommended Options for Product Groups:
- Category (Google Product Category)
- Product Type (use defined category, usually more specific than Category)
- Custom Label (define custom groupings like bestseller or seasonal groups)
- Item ID (product specific breakdown)
We’ll often use product type or custom label and use multiple steps. Here is an example of drilling down to a single item.
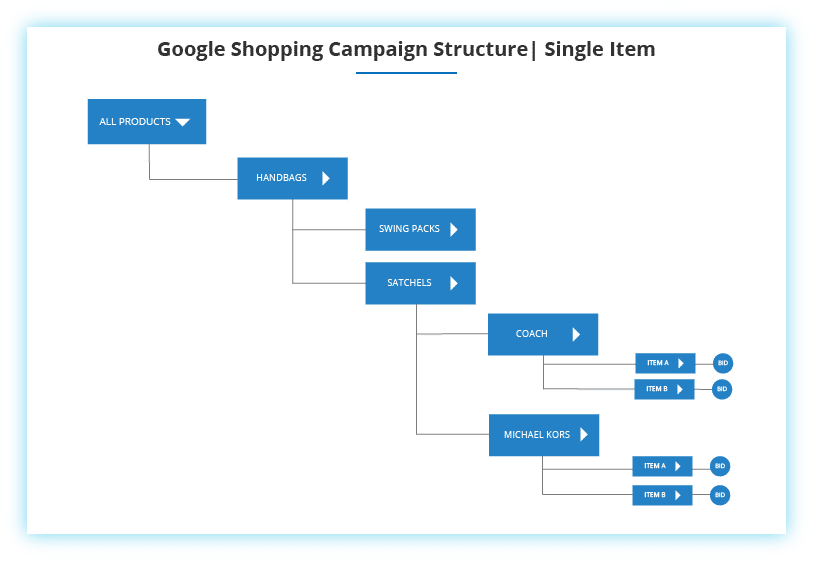
The main thing to consider is what makes the most sense to group things by to assess performance and control what’s running in the future.
To learn more about structuring your campaigns by different product groups, check out our post on Google Shopping for Ecommerce: Product Group Structure.
How Can AdShark Marketing Help?
If you have an e-commerce store and haven’t started advertising using Product Listing Ads on Google Shopping, you could be missing out on sales. We can help you set up an account and choose the best products to focus on for the biggest ROI.
Drop us an email and we can audit your account and provide a custom strategy to help you grow your online sales.
Ready To Grow?
Let's Talk!


